I was given a task for the CPDD module during this term break. The task was to design an object which is not easily subtractive manufacturing by a 3D printer. I tried to search online to gain some ideas and also watch some Youtube videos. Finally, I had an idea that came up in my mind which was I wanted to design an hourglass!!! Since I had the idea, the next step was to design it with Fusion360 before 3D printing it.
Fusion 360
1. First, I clicked the create sketch icon and select a construction plane.
2. Under Modify, I clicked the 'Change Parameter' icon. After that, it will display a parameters dialog. I set some parameters as in the diagram below.

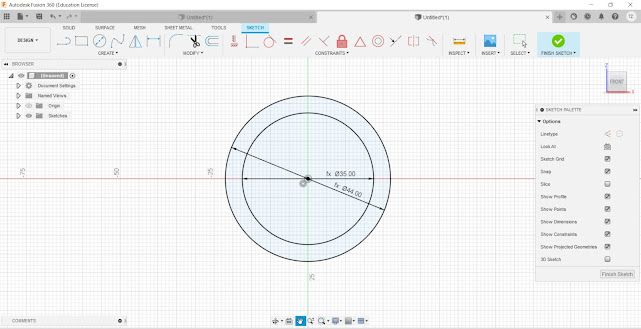
3. Select the center diameter circle icon and draw 2 circles. the dimensions of these 2 circles were based on the parameters I had created with the expression of diameter 1 and diameter 3.
3. After that, I drew a small circle in the annulus area with a dimension of 2.5mm. 
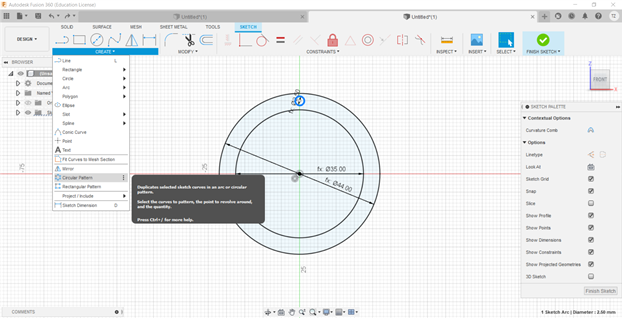
5. Next, there will be a circular pattern panel came out. Click the center point selection and then select the centre point of the circles. Set the quantity as 3.

6. Extrude the annulus area without the 3 small circles with 5mm thickness.

7. To create another same annulus volume at the top, I constructed an offset plane. Under construction > offset plane.

8. Set the distance as length expression.


10. Select all the 5 geometries that I had drawn and then click ok. The same shape as the bottom will show at the offset plane side. After that, extrude the top annulus area as 5mm thickness.

11. To create an hourglass shape, I had to draw another plane between the 2 annulus volumes. Again, select the offset plane under construction. Then, set the distance as 40mm which was the centre section of the 2 annulus volumes.

12. Select the centre plane that was created just now. Draw a 5mm circle at the centre point.

13. Click the home view for easier visualisation. Next, select the loft selection under the create section.

14. Click the 3 profiles from the bottom to top which are highlighted in blue colour as shown below.
15. Finally, extrude the 3 circles in the annulus area as "length" expression dimension.

16. An hourglass was done! Save this design as an STL file.

3D Printing
1. Open the STL file that I saved in the previous step. It will open as the Ultimaker Cura software.
2. Choose the Creality Enter 3 printer. Then, click the slice button at the right bottom corner.

3. Unfortunately, my product was needed to spend 2 hours and 36 minutes for 3D printing.
4. I decided to change the scale of the object from 44×44×80 mm to 27.5×27.5×50mm and maintain the standard quality as 0.2mm and 20% infill.
5. After adjusting the scale, the object was required 1 hour to print out.
6. Before using the 3D printer, I saved the file on an SD card thumb drive.
7. After that, I insert the SD card at the left corner of the base 3D printer.
8. The control screen of the 3D printer will be on the right-hand side as shown below.

9. On the control screen, select prepare section and then select the Preheat PLA selection.
10. Next, click the disable stepper and then choose my product file which I have saved.
11. The printer will begin to print my product.
Here are some pictures of my progress.📷⌛


Reflection
In my opinion, the most challenging part of this task is to make sure my design can print out with a maximum duration of 1 hour. Hence, my design should not be too complex and in the meantime meet the not easily made subtractively requirement. I spent more time working on this part and finally, it was done well. I was able to design a product that was meet the requirement in Fusion 360 and also the time required for 3D printing was 1 hour.
My product is considered as not easily made subtractively is because there are some parts of my product that required curving and this cannot be easily done by the subtractive manufacturing process. I am quite satisfied with my product even though it is not perfect as the hourglass in real life. It is very fun to have a 3D printing experience in my life.
No comments:
Post a Comment